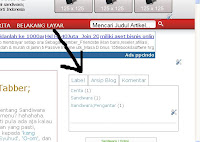
Apakah hubungannya perbincangan tentang Sandiwara dengan membuat Tabber atawa Tab-menu? hahahaha. Sudah pasti gak ada. Dan sudah pasti pula ada aja kalau mau tetap (maksa) dihubung2kan. Dan yang pasti, tulisan ini bukan konfrontasi terbuka kepada '
kang Rohman', '
bung Khendin, '
pak Fatih-Syuhud', '
O-om', dan atau jawara blogging yang lain. Maksudnya ? Ya, saya gak sedang mempertunjukkan bahwa saya menguasai seluk-beluk 'bahasa-CSS dan HTML', jadi jangan tanyakan yang selain ini, ya. Ini cuma karena pengen berbagi pengetahuan, karena hal ini saya dapatkan dengan perjuangan serius, menempuh perjalanan panjang yang melelahkan, wuakakak.
Bagaimana ceritanya?
Saya sebenarnya nyari2 juga di tempat2 'makan' di atas (maksudnya tempat belajar nge-blog), tapi gak ketemu. Mungkin saya yang gak pas masang kata-kunci nya, atau mungkin juga memang tidak ada di sana. Di blognya bung Khendin ada, tapi saya kurang berhasil menerapkannya. Maklum baru...Saya pikir soalnya sederhana, kang Rohman, Pah Fatih, mas Khendin dan O-om, mungkin lebih mendahulukan pertanyaan-pertanyaan rekan-rekan blogger yang pasti jumlahnya tidak sedikit. Dan, kemungkinan besar, pertanyaan2 tersebut belum banyak yang menanyakan soal membuat tab-menu/ tabber itu. Atau mungkin, karena benyak yang mau nanya, tapi gak tau namanya (kayak saya juga, hahahahahaha)...
Lho, kok malah cerita?
Iya, namanya juga sandiwara, harus ada 'mukadimah' dulu....hehehehe. (Nah, khan ada kaitannya?).
Oke, langsung aja sekarang...
Setelah bertahun-tahun nyari-nyari, akhirnya saya temukan juga sang putri malu itu, eh...maksudnya tab-menu/tabber yang akhirnya bisa saya terapkan. Hasilnya bisa dilihat sendiri di sidebar blog ini . Keren khan? (awas kalau bilang gak..).
Saya cuma mencoba membuatnya lebih operasional, langsung dipraktekkan. Tapi, kalau mau versi aslinya, silahkan kunjungi http://www.barelyfitz.com/projects/tabber/, atau klik saja di Sini.
Aduh malah mukadimah lagi, kapan ceritanya ?
Oke, Sekarang saya masuk ke 'tubuh cerita'. Teman-teman blogger (terutama yang baru kayak saya) yang mau lansung praktek, silahkan memerankan cerita saya ini...
Begini ceritanya...
Pada sebuah siang, saya memasuki account blogger saya, lalu sesampai di dalamnya, saya klik menu tata letak (setting), lalu mengklik menu edit HTML...
Sesampai di sana, saya tidak mencentang expand template widget, sungguh saya tidak mencentang expand template widget, karena hal itu akan membuat kode HTML yang terdapat di dalamnya menjadi semakin panjang, rumit dan memusingkan, dan saya tidak suka itu...
Lalu, saya mulai dengan menambahkan kode berikut pada bagian CSS dari template, atau sebenarnya untuk lebih mudah, saya bisa menambahkannya atau meletakkan sebelum elemen
sidebar.
" Cari saja kode
#sidebar-wrapper {
dan tambahkan di atasnya", begitu bathin saya.
Kode yang saya tambahkan di atasnya itu adalah:
/*--------Tabber ------*/
#tabsidebar-wrapper{
width: 360px; /* Sesuaikan dengan lebar Sidebar */
float: right;
border: 1px none #CCC;
margin: 0px;
}
.tabberlive .tabbertabhide {display:none;}
.tabber {display:none;}
.tabberlive {margin-top:1em;}
.tabber h2 {
border-bottom:1px solid $bordercolor; /* Sesuaikan dengan variable Template */margin-bottom: .3em;
padding: 0;
line-height:1.2em;
}
.tabber .widget {margin-bottom: 1em;}
.tabber .widget-content {margin: 0 0px;}
ul.tabbernav{
margin:0;
padding: 8px 0;
border-bottom: 1px solid $bordercolor;
}
ul.tabbernav li{
list-style: none;
margin: 0;
display: inline;
}
ul.tabbernav li a{
padding: 8px 0.5em;
margin-right:2px;
border: 1px solid $bordercolor;
border-bottom: none;
background: #FFFFFF;
text-decoration: none;
}
ul.tabbernav li a:link { color:#369;}
ul.tabbernav li a:visited { color: #369;}
ul.tabbernav li a:hover{color:#369; background: #e6e6e6; border-color: 1px solid $bordercolor;}
ul.tabbernav li.tabberactive a{
background-color: #FFFFFF;
color: #369;
border-bottom: 1px solid $bordercolor;
}
ul.tabbernav li.tabberactive a:hover{
color: #369;
background: #e6e6e6;
border-bottom: 1px solid $bordercolor;
}
.tabberlive .tabbertab {
background: #FFFFFF;
padding:5px;
border:1px solid $bordercolor;
border-top:0;
}
.tabberlive .tabbertab h2 {display:none;}
.tabberlive .tabbertab h3 {display:none;}
/*--------Akhir Tabber ------*/
lalu, saya mencari kode </head>, dan memasang teks Javascript berikut, tepat di atasnya:
<script type='text/javascript'>
/*==================================================
$Id: tabber.js,v 1.9 2006/04/27 20:51:51 pat Exp $
tabber.js by Patrick Fitzgerald pat@barelyfitz.com
Documentation can be found at the following URL:
http://www.barelyfitz.com/projects/tabber/
License (http://www.opensource.org/licenses/mit-license.php)
Copyright (c) 2006 Patrick Fitzgerald
Permission is hereby granted, free of charge, to any person
obtaining a copy of this software and associated documentation files
(the "Software"), to deal in the Software without restriction,
including without limitation the rights to use, copy, modify, merge,
publish, distribute, sublicense, and/or sell copies of the Software,
and to permit persons to whom the Software is furnished to do so,
subject to the following conditions:
The above copyright notice and this permission notice shall be
included in all copies or substantial portions of the Software.
THE SOFTWARE IS PROVIDED "AS IS", WITHOUT WARRANTY OF ANY KIND,
EXPRESS OR IMPLIED, INCLUDING BUT NOT LIMITED TO THE WARRANTIES OF
MERCHANTABILITY, FITNESS FOR A PARTICULAR PURPOSE AND
NONINFRINGEMENT. IN NO EVENT SHALL THE AUTHORS OR COPYRIGHT HOLDERS
BE LIABLE FOR ANY CLAIM, DAMAGES OR OTHER LIABILITY, WHETHER IN AN
ACTION OF CONTRACT, TORT OR OTHERWISE, ARISING FROM, OUT OF OR IN
CONNECTION WITH THE SOFTWARE OR THE USE OR OTHER DEALINGS IN THE
SOFTWARE.
==================================================*/
function tabberObj(argsObj)
{
var arg; /* name of an argument to override */
/* Element for the main tabber div. If you supply this in argsObj,
then the init() method will be called.*/
this.div = null;
/* Class of the main tabber div */
this.classMain = "tabber";
/* Rename classMain to classMainLive after tabifying
(so a different style can be applied)*/
this.classMainLive = "tabberlive";
/* Class of each DIV that contains a tab */
this.classTab = "tabbertab";
/* Class to indicate which tab should be active on startup */
this.classTabDefault = "tabbertabdefault";
/* Class for the navigation UL */
this.classNav = "tabbernav";
/* When a tab is to be hidden, instead of setting display='none', we
set the class of the div to classTabHide. In your screen
stylesheet you should set classTabHide to display:none. In your
print stylesheet you should set display:block to ensure that all
the information is printed.*/
this.classTabHide = "tabbertabhide";
/* Class to set the navigation LI when the tab is active, so you can
use a different style on the active tab.*/
this.classNavActive = "tabberactive";
/* Elements that might contain the title for the tab, only used if a
title is not specified in the TITLE attribute of DIV classTab.*/
this.titleElements = ['h2','h3','h4','h5','h6'];
/* Should we strip out the HTML from the innerHTML of the title elements?
This should usually be true.*/
this.titleElementsStripHTML = true;
/* If the user specified the tab names using a TITLE attribute on
the DIV, then the browser will display a tooltip whenever the
mouse is over the DIV. To prevent this tooltip, we can remove the
TITLE attribute after getting the tab name.*/
this.removeTitle = true;
/* If you want to add an id to each link set this to true */
this.addLinkId = false;
/* If addIds==true, then you can set a format for the ids.
<tabberid> will be replaced with the id of the main tabber div.
<tabnumberzero> will be replaced with the tab number
(tab numbers starting at zero)
<tabnumberone> will be replaced with the tab number
(tab numbers starting at one)
<tabtitle> will be replaced by the tab title
(with all non-alphanumeric characters removed)*/
this.linkIdFormat = '<tabberid>nav<tabnumberone>';
/* You can override the defaults listed above by passing in an object:
var mytab = new tabber({property:value,property:value});*/
for (arg in argsObj) { this[arg] = argsObj[arg]; }
/* Create regular expressions for the class names; Note: if you
change the class names after a new object is created you must
also change these regular expressions.*/
this.REclassMain = new RegExp('\\b' + this.classMain + '\\b', 'gi');
this.REclassMainLive = new RegExp('\\b' + this.classMainLive + '\\b', 'gi');
this.REclassTab = new RegExp('\\b' + this.classTab + '\\b', 'gi');
this.REclassTabDefault = new RegExp('\\b' + this.classTabDefault + '\\b', 'gi');
this.REclassTabHide = new RegExp('\\b' + this.classTabHide + '\\b', 'gi');
/* Array of objects holding info about each tab */
this.tabs = new Array();
/* If the main tabber div was specified, call init() now */
if (this.div) {
this.init(this.div);
/* We don't need the main div anymore, and to prevent a memory leak
in IE, we must remove the circular reference between the div
and the tabber object. */
this.div = null;
}
}
/*--------------------------------------------------
Methods for tabberObj
--------------------------------------------------*/
tabberObj.prototype.init = function(e)
{
/* Set up the tabber interface.
e = element (the main containing div)
Example:
init(document.getElementById('mytabberdiv'))*/
var
childNodes, /* child nodes of the tabber div */
i, i2, /* loop indices */
t, /* object to store info about a single tab */
defaultTab=0, /* which tab to select by default */
DOM_ul, /* tabbernav list */
DOM_li, /* tabbernav list item */
DOM_a, /* tabbernav link */
aId, /* A unique id for DOM_a */
headingElement; /* searching for text to use in the tab */
/* Verify that the browser supports DOM scripting */
if (!document.getElementsByTagName) { return false; }
/* If the main DIV has an ID then save it. */
if (e.id) {
this.id = e.id;
}
/* Clear the tabs array (but it should normally be empty) */
this.tabs.length = 0;
/* Loop through an array of all the child nodes within our tabber element. */
childNodes = e.childNodes;
for(i=0; i < childNodes.length; i++) {
/* Find the nodes where class="tabbertab" */
if(childNodes[i].className &&
childNodes[i].className.match(this.REclassTab)) {
/* Create a new object to save info about this tab */
t = new Object();
/* Save a pointer to the div for this tab */
t.div = childNodes[i];
/* Add the new object to the array of tabs */
this.tabs[this.tabs.length] = t;
/* If the class name contains classTabDefault,
then select this tab by default.
*/
if (childNodes[i].className.match(this.REclassTabDefault)) {
defaultTab = this.tabs.length-1;
}
}
}
/* Create a new UL list to hold the tab headings */
DOM_ul = document.createElement("ul");
DOM_ul.className = this.classNav;
/* Loop through each tab we found */
for (i=0; i < this.tabs.length; i++) {
t = this.tabs[i];
/* Get the label to use for this tab:
From the title attribute on the DIV,
Or from one of the this.titleElements[] elements,
Or use an automatically generated number. */
t.headingText = t.div.title;
/* Remove the title attribute to prevent a tooltip from appearing */
if (this.removeTitle) { t.div.title = ''; }
if (!t.headingText) {
/* Title was not defined in the title of the DIV,
So try to get the title from an element within the DIV.
Go through the list of elements in this.titleElements
(typically heading elements ['h2','h3','h4']) */
for (i2=0; i2<this.titleElements.length; i2++) {
headingElement = t.div.getElementsByTagName(this.titleElements[i2])[0];
if (headingElement) {
t.headingText = headingElement.innerHTML;
if (this.titleElementsStripHTML) {
t.headingText.replace(/<br>/gi," ");
t.headingText = t.headingText.replace(/<[^>]+>/g,"");
}
break;
}
}
}
if (!t.headingText) {
/* Title was not found (or is blank) so automatically generate a
number for the tab.*/
t.headingText = i + 1;
}
/* Create a list element for the tab */
DOM_li = document.createElement("li");
/* Save a reference to this list item so we can later change it to
the "active" class */
t.li = DOM_li;
/* Create a link to activate the tab */
DOM_a = document.createElement("a");
DOM_a.appendChild(document.createTextNode(t.headingText));
DOM_a.href = "javascript:void(null);";
DOM_a.title = t.headingText;
DOM_a.onclick = this.navClick;
/* Add some properties to the link so we can identify which tab
was clicked. Later the navClick method will need this.*/
DOM_a.tabber = this;
DOM_a.tabberIndex = i;
/* Do we need to add an id to DOM_a? */
if (this.addLinkId && this.linkIdFormat) {
/* Determine the id name */
aId = this.linkIdFormat;
aId = aId.replace(/<tabberid>/gi, this.id);
aId = aId.replace(/<tabnumberzero>/gi, i);
aId = aId.replace(/<tabnumberone>/gi, i+1);
aId = aId.replace(/<tabtitle>/gi, t.headingText.replace(/[^a-zA-Z0-9\-]/gi, ''));
DOM_a.id = aId;
}
/* Add the link to the list element */
DOM_li.appendChild(DOM_a);
/* Add the list element to the list */
DOM_ul.appendChild(DOM_li);
}
/* Add the UL list to the beginning of the tabber div */
e.insertBefore(DOM_ul, e.firstChild);
/* Make the tabber div "live" so different CSS can be applied */
e.className = e.className.replace(this.REclassMain, this.classMainLive);
/* Activate the default tab, and do not call the onclick handler */
this.tabShow(defaultTab);
/* If the user specified an onLoad function, call it now. */
if (typeof this.onLoad == 'function') {
this.onLoad({tabber:this});
}
return this;
};
tabberObj.prototype.navClick = function(event)
{
/* This method should only be called by the onClick event of an <A>
element, in which case we will determine which tab was clicked by
examining a property that we previously attached to the <A>
element.
Since this was triggered from an onClick event, the variable
"this" refers to the <A> element that triggered the onClick
event (and not to the tabberObj).
When tabberObj was initialized, we added some extra properties
to the <A> element, for the purpose of retrieving them now. Get
the tabberObj object, plus the tab number that was clicked.*/
var
rVal, /* Return value from the user onclick function */
a, /* element that triggered the onclick event */
self, /* the tabber object */
tabberIndex, /* index of the tab that triggered the event */
onClickArgs; /* args to send the onclick function */
a = this;
if (!a.tabber) { return false; }
self = a.tabber;
tabberIndex = a.tabberIndex;
/* Remove focus from the link because it looks ugly.
I don't know if this is a good idea...*/
a.blur();
/* If the user specified an onClick function, call it now.
If the function returns false then do not continue.*/
if (typeof self.onClick == 'function') {
onClickArgs = {'tabber':self, 'index':tabberIndex, 'event':event};
/* IE uses a different way to access the event object */
if (!event) { onClickArgs.event = window.event; }
rVal = self.onClick(onClickArgs);
if (rVal === false) { return false; }
}
self.tabShow(tabberIndex);
return false;
};
tabberObj.prototype.tabHideAll = function()
{
var i; /* counter */
/* Hide all tabs and make all navigation links inactive */
for (i = 0; i < this.tabs.length; i++) {
this.tabHide(i);
}
};
tabberObj.prototype.tabHide = function(tabberIndex)
{
var div;
if (!this.tabs[tabberIndex]) { return false; }
/* Hide a single tab and make its navigation link inactive */
div = this.tabs[tabberIndex].div;
/* Hide the tab contents by adding classTabHide to the div */
if (!div.className.match(this.REclassTabHide)) {
div.className += ' ' + this.classTabHide;
}
this.navClearActive(tabberIndex);
return this;
};
tabberObj.prototype.tabShow = function(tabberIndex)
{
/* Show the tabberIndex tab and hide all the other tabs */
var div;
if (!this.tabs[tabberIndex]) { return false; }
/* Hide all the tabs first */
this.tabHideAll();
/* Get the div that holds this tab */
div = this.tabs[tabberIndex].div;
/* Remove classTabHide from the div */
div.className = div.className.replace(this.REclassTabHide, '');
/* Mark this tab navigation link as "active" */
this.navSetActive(tabberIndex);
/* If the user specified an onTabDisplay function, call it now. */
if (typeof this.onTabDisplay == 'function') {
this.onTabDisplay({'tabber':this, 'index':tabberIndex});
}
return this;
};
tabberObj.prototype.navSetActive = function(tabberIndex)
{
/* Note: this method does *not* enforce the rule
that only one nav item can be active at a time.*/
/* Set classNavActive for the navigation list item */
this.tabs[tabberIndex].li.className = this.classNavActive;
return this;
};
tabberObj.prototype.navClearActive = function(tabberIndex)
{
/* Note: this method does *not* enforce the rule
that one nav should always be active.*/
/* Remove classNavActive from the navigation list item */
this.tabs[tabberIndex].li.className = '';
return this;
};
/*==================================================*/
function tabberAutomatic(tabberArgs)
{
/* This function finds all DIV elements in the document where
class=tabber.classMain, then converts them to use the tabber
interface.
tabberArgs = an object to send to "new tabber()"*/
var
tempObj, /* Temporary tabber object */
divs, /* Array of all divs on the page */
i; /* Loop index */
if (!tabberArgs) { tabberArgs = {}; }
/* Create a tabber object so we can get the value of classMain */
tempObj = new tabberObj(tabberArgs);
/* Find all DIV elements in the document that have class=tabber */
/* First get an array of all DIV elements and loop through them */
divs = document.getElementsByTagName("div");
for (i=0; i < divs.length; i++) {
/* Is this DIV the correct class? */
if (divs[i].className &&
divs[i].className.match(tempObj.REclassMain)) {
/* Now tabify the DIV */
tabberArgs.div = divs[i];
divs[i].tabber = new tabberObj(tabberArgs);
}
}
return this;
}
/*==================================================*/
function tabberAutomaticOnLoad(tabberArgs)
{
/* This function adds tabberAutomatic to the window.onload event,
so it will run after the document has finished loading.*/
var oldOnLoad;
if (!tabberArgs) { tabberArgs = {}; }
/* Taken from: http://simon.incutio.com/archive/2004/05/26/addLoadEvent */
oldOnLoad = window.onload;
if (typeof window.onload != 'function') {
window.onload = function() {
tabberAutomatic(tabberArgs);
};
} else {
window.onload = function() {
oldOnLoad();
tabberAutomatic(tabberArgs);
};
}
}
/*==================================================*/
/* Run tabberAutomaticOnload() unless the "manualStartup" option was specified */
if (typeof tabberOptions == 'undefined') {
tabberAutomaticOnLoad();
} else {
if (!tabberOptions['manualStartup']) {
tabberAutomaticOnLoad(tabberOptions);
}
}
</script>
nah, setelah dua langkah itu, sampailah saya pada langkah yang terakhir. Saya lalu mencari kode berikut:
<div id='sidebar-wrapper'>
setelah menemukannya, saya letakkan tepat di atasnya kode berikut :
<div id='tabsidebar-wrapper'>
<div class='tabber' id='tab1'>
<div class='tabbertab'>
<b:section class='sidebar' id='tabbertab1' maxwidgets='1' showaddelement='yes'/>
</div>
<div class='tabbertab'>
<b:section class='sidebar' id='tabbertab2' maxwidgets='1' showaddelement='yes'/>
</div>
<div class='tabbertab'>
<b:section class='sidebar' id='tabbertab3' maxwidgets='1' showaddelement='yes'/>
</div>
</div></div>
nah, akhirnya, saya tinggal meng-save deh....
Dan kemudian, saya melihat di menu tata-letak lagi..., di sana, di bagian sidebar, ada nomor 1,2,3, saya kemudian meletakkan widget yang saya sukai di ketiga tab baru itu... Dan pangeran yang gagah berani, hidup bahagia bersama tabber/tab-menu nya...
***
Selamat mencoba, semoga berhasil bertabber-tab ria.Hehehehehe
NB: Buat yang mau coba memposting kode HTML, coba gunakan fasilitas encode di sini

.png)


 9:20 PM
 6 comments
 Para sahabat semua, berikut ini adalah tautan-tautan yang mungkin berguna jika sahabat ikuti. Ini hanya sekedar saran aja. Soalnya saya juga belum membuktikan apa manfaatnya. Menurut cerita blogger-blogger kawakan sih, cara ini bisa membuat blog kita dikenal dan lebih banyak dikunjungi. Sekaligus cerita-nya, membuka peluang lebih luas untuk membuat tautan dan kaitan (link).


